Free File Shredder
Online Help for File Shredder
File Shredder is released under GNU/GPL General Public License. It is free for both personal and commercial use.
File Shredder works on WIndows NT, WIndows 2000, Windows XP, Windows 2003 Server, Windows Vista, Windows 7,8 and Windows 10.
There is no minimum hardware requirement for File Shredder to run properly, however on faster computers shredding will be executed faster.
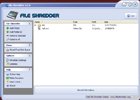
click to view screenshot
Installation
If you haven't already, click here to download latest version of File Shredder. Save file_shredder_setup.exe on hard disk and double click on it to launch installation. The default folder File Shredder will be installed to is C:\Program Files\File Shredder. After installation is completed a program group is created under Start - Programs - File Shredder, and an icon is placed on desktop.
Usage
Add File(s) - Click to add files ready to be shredded. A file picker will appear. Select one or more files and press open. The files will appear in main pane. You can add as manu files as you want. Note that adding the files into shredding queue does not delete them and you can remove the files from queue latter
Add Folder(s) - Click to add folders ready to be shredded. A folder picker will appear. Select a folder and press open. The folder will appear in main pane. You can add as manu folders as you want but you have to add them one by one. The whole folder structure is added including files and subfolders.
Remove Selected - Click to remove a file(s) or folder(s) from the shredding queue. Don't confuse this option with Shred Files Now, this option only removes files that are intended for shredding from the queue and no changes are made to the actual files or folders on hard drive.
Remove All - Click to remove all file(s) or folder(s) from the shredding queue. This option does the same as Remove Selected but it will clean the complete queue. No changes to files and folders on hard drive will occur.
Shred Free Disk Space - This option will shred unused or free disk space across the whole disk volume. For instance, this option is very useful if you haven't shred your unwanted files regularly but instead you used regular windows delete command and now you want your previously deleted files unretrievable. Those files now can not be shredded by picking them since they are already deleted. This option will enforce shredding of everything you have deleted once using the regular delete command, whether it was yesterday or months ago.
Shred Free Disk Space - After you picked the files ready to be shredded click on this button to execute permanent removal of files. Warning: this option can not be undone, make sure you haven't picked non intended files accidentally.
Shredder Settings
Program Settings
Enable Shell Integration - Checking this option will make new entries when you right click on file on folder in Windows Explorer. Entries are "Secure Delete Files" which will shred files you have right clicked on, "Remember to be deleted latter" which puts files or folders into shredding queue and "Call FIle Shredder" which launches the application itself.
Confirmations - This group of options tells the program if it should display confirmation window of certain operations. To assure unintentional or accidental shredding I recommend this to be set on which is the default.
Algorithms - Choose the shredding algorithm. You can learn about algorithms used to shred files here.
Visual Options - Choose whether you want to save same space on interface by hiding the top pane and whether you want to run program maximized.
Bookmarking links